> ## Documentation Index
> Fetch the complete documentation index at: https://docs.navattic.com/llms.txt
> Use this file to discover all available pages before exploring further.

# Checklist demos

> Learn how to create and use Checklists in your demos.

export const MediaCard = ({title = '', url, type = 'demo'}) => {
  const attributes = type === 'demo' ? {
    'data-navattic-open': url,
    'data-navattic-title': title
  } : {
    'data-video': url
  };
  return <div {...attributes} className="hidden w-auto cursor-pointer overflow-hidden rounded-lg border border-gray-200 shadow-sm md:inline-block dark:border-gray-700">
  <div className="flex items-center gap-3 bg-white px-3 py-2 dark:bg-gray-800">
    <div className={`flex h-7 w-7 items-center justify-center rounded-md ${type === 'video' ? 'bg-blue-100 dark:bg-blue-900' : 'bg-orange-100 dark:bg-orange-900'}`} style={{
    backgroundColor: type === 'video' ? 'var(--video-bg)' : 'var(--demo-bg)'
  }}>
      <Icon icon={type === 'video' ? 'circle-play' : 'square-mouse-pointer'} color={type === 'video' ? 'var(--video-icon)' : 'var(--demo-icon)'} />
    </div>
    <div>
      <div className="text-sm font-medium text-gray-900 dark:text-gray-100">
        {type === 'video' ? 'Watch video' : 'Try a demo'}
      </div>
      <div className="text-sm text-gray-500 dark:text-gray-400">{title}</div>
    </div>
  </div>
  <style jsx>{`
    :root {
      --video-bg: #dbeafe;
      --video-icon: #2563eb;
      --demo-bg: #ffedd5;
      --demo-icon: #ea580c;
    }
    :global(.dark) {
      --video-bg: #1e3a8a;
      --video-icon: #60a5fa;
      --demo-bg: #7c2d12;
      --demo-icon: #fb923c;
    }
  `}</style>
</div>;
};

<Frame>
  <img className="overflow-hidden rounded-xl border" src="https://mintcdn.com/navattic-app/QNOHztjorxprHO7d/images/checklist.png?fit=max&auto=format&n=QNOHztjorxprHO7d&q=85&s=5ec9e17d0f6a34ccddfba20b785e8d95" alt="Checklist" width="1736" height="768" data-path="images/checklist.png" />
</Frame>

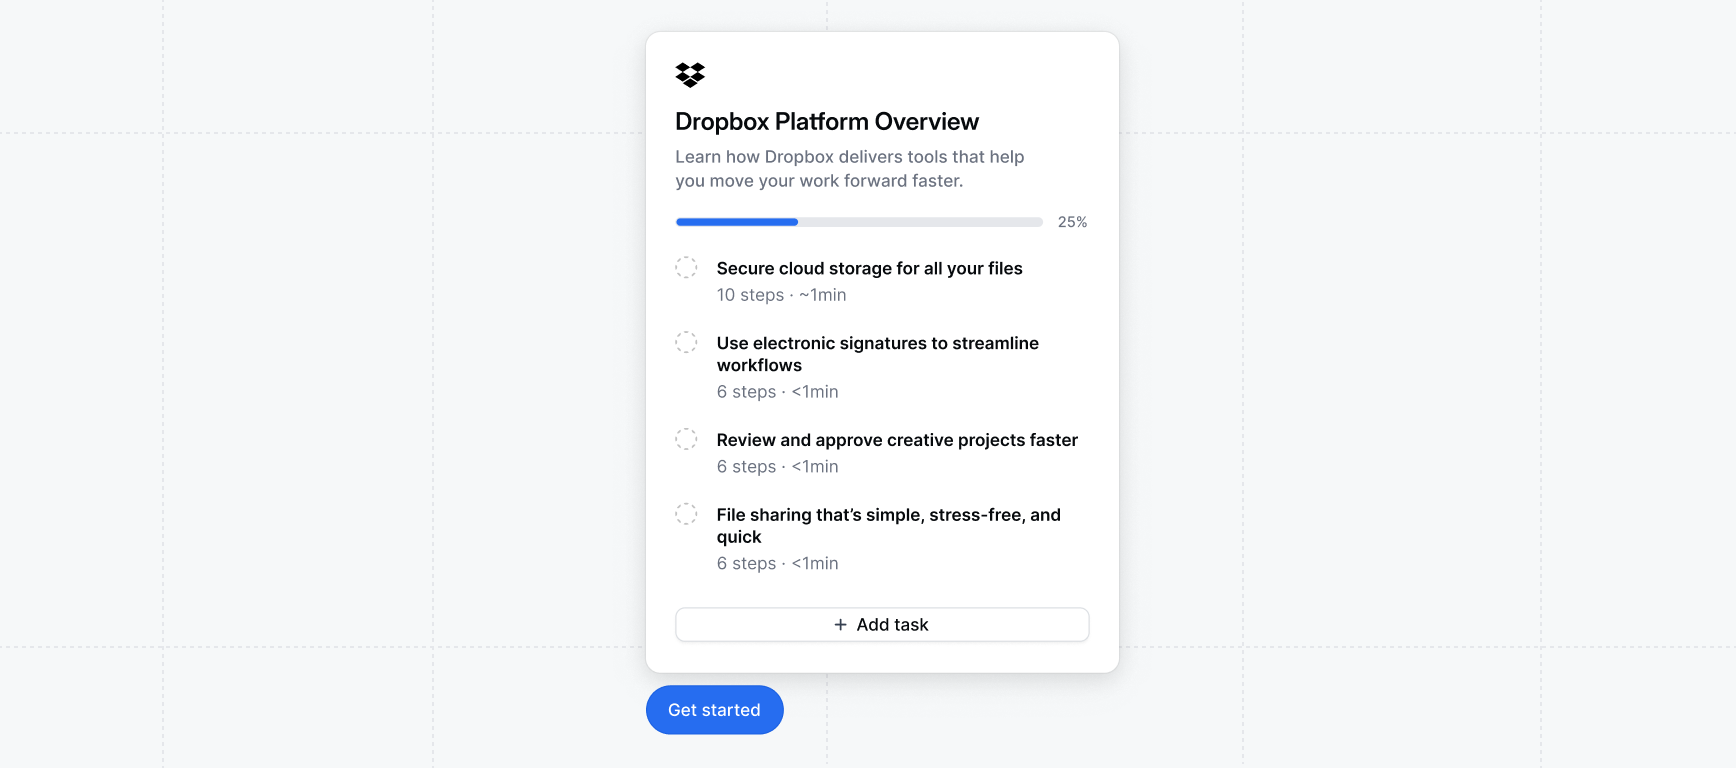
<Icon icon="list-checks" /> **Checklists** are great for organizing multiple flows from a demo into
a series of tasks. This enables the visitor to decide which flow to engage with next at any time.

## Creating a checklist demo

Follow these steps to create your first demo with a Checklist:

<Steps>
  <Step title="Create a Checklist">
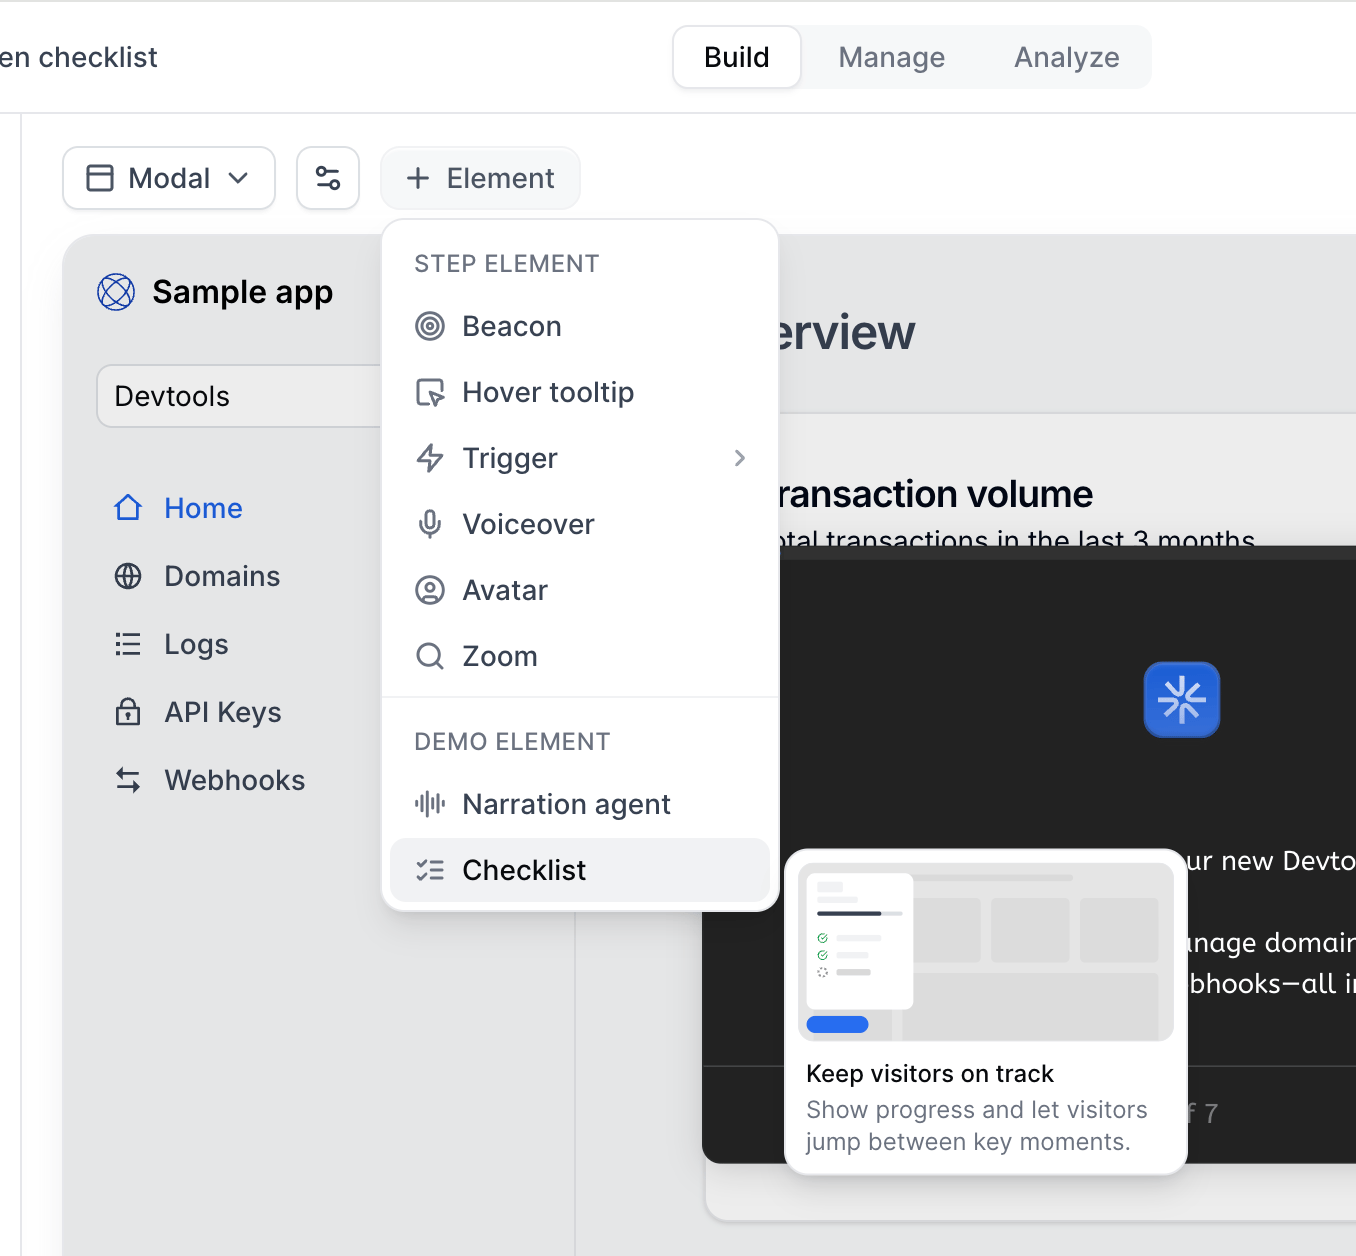
    Within your demo's **Build** tab, select **+Element** > **Checklist** to get started. Most Checklists will incorporate 4-6 Tasks that start different Flows. When using a Checklist, we recommend keeping individual Flows to 5-9 steps each.

    <img src="https://mintcdn.com/navattic-app/GuOdWqivdactDjf8/images/checklist-add-checklist-1.png?fit=max&auto=format&n=GuOdWqivdactDjf8&q=85&s=f78fbba54886234f565b695dd8e768f6" alt="Checklist Add Checklist 1" title="Checklist Add Checklist 1" className="mx-auto" style={{ width:"55%" }} width="1356" height="1256" data-path="images/checklist-add-checklist-1.png" />
  </Step>

  <Step title="Select either floating or sidebar">
    Checklists are automatically displayed using the **Sidebar** layout, where the checklist stays open permanently on the side of your demo, providing continuous access throughout.

    Alternatively, you can choose the **Floating** Layout, which includes the Checklist launcher. The Checklist can be opened by clicking the Checklist Launcher, using the **Launch after flow start** Setting, or through various buttons, beacons, or triggers configured with the **Expand checklist** action.

    To switch between the two, you open the Checklist settings.
  </Step>

  <Step title="Add a title and tasks">
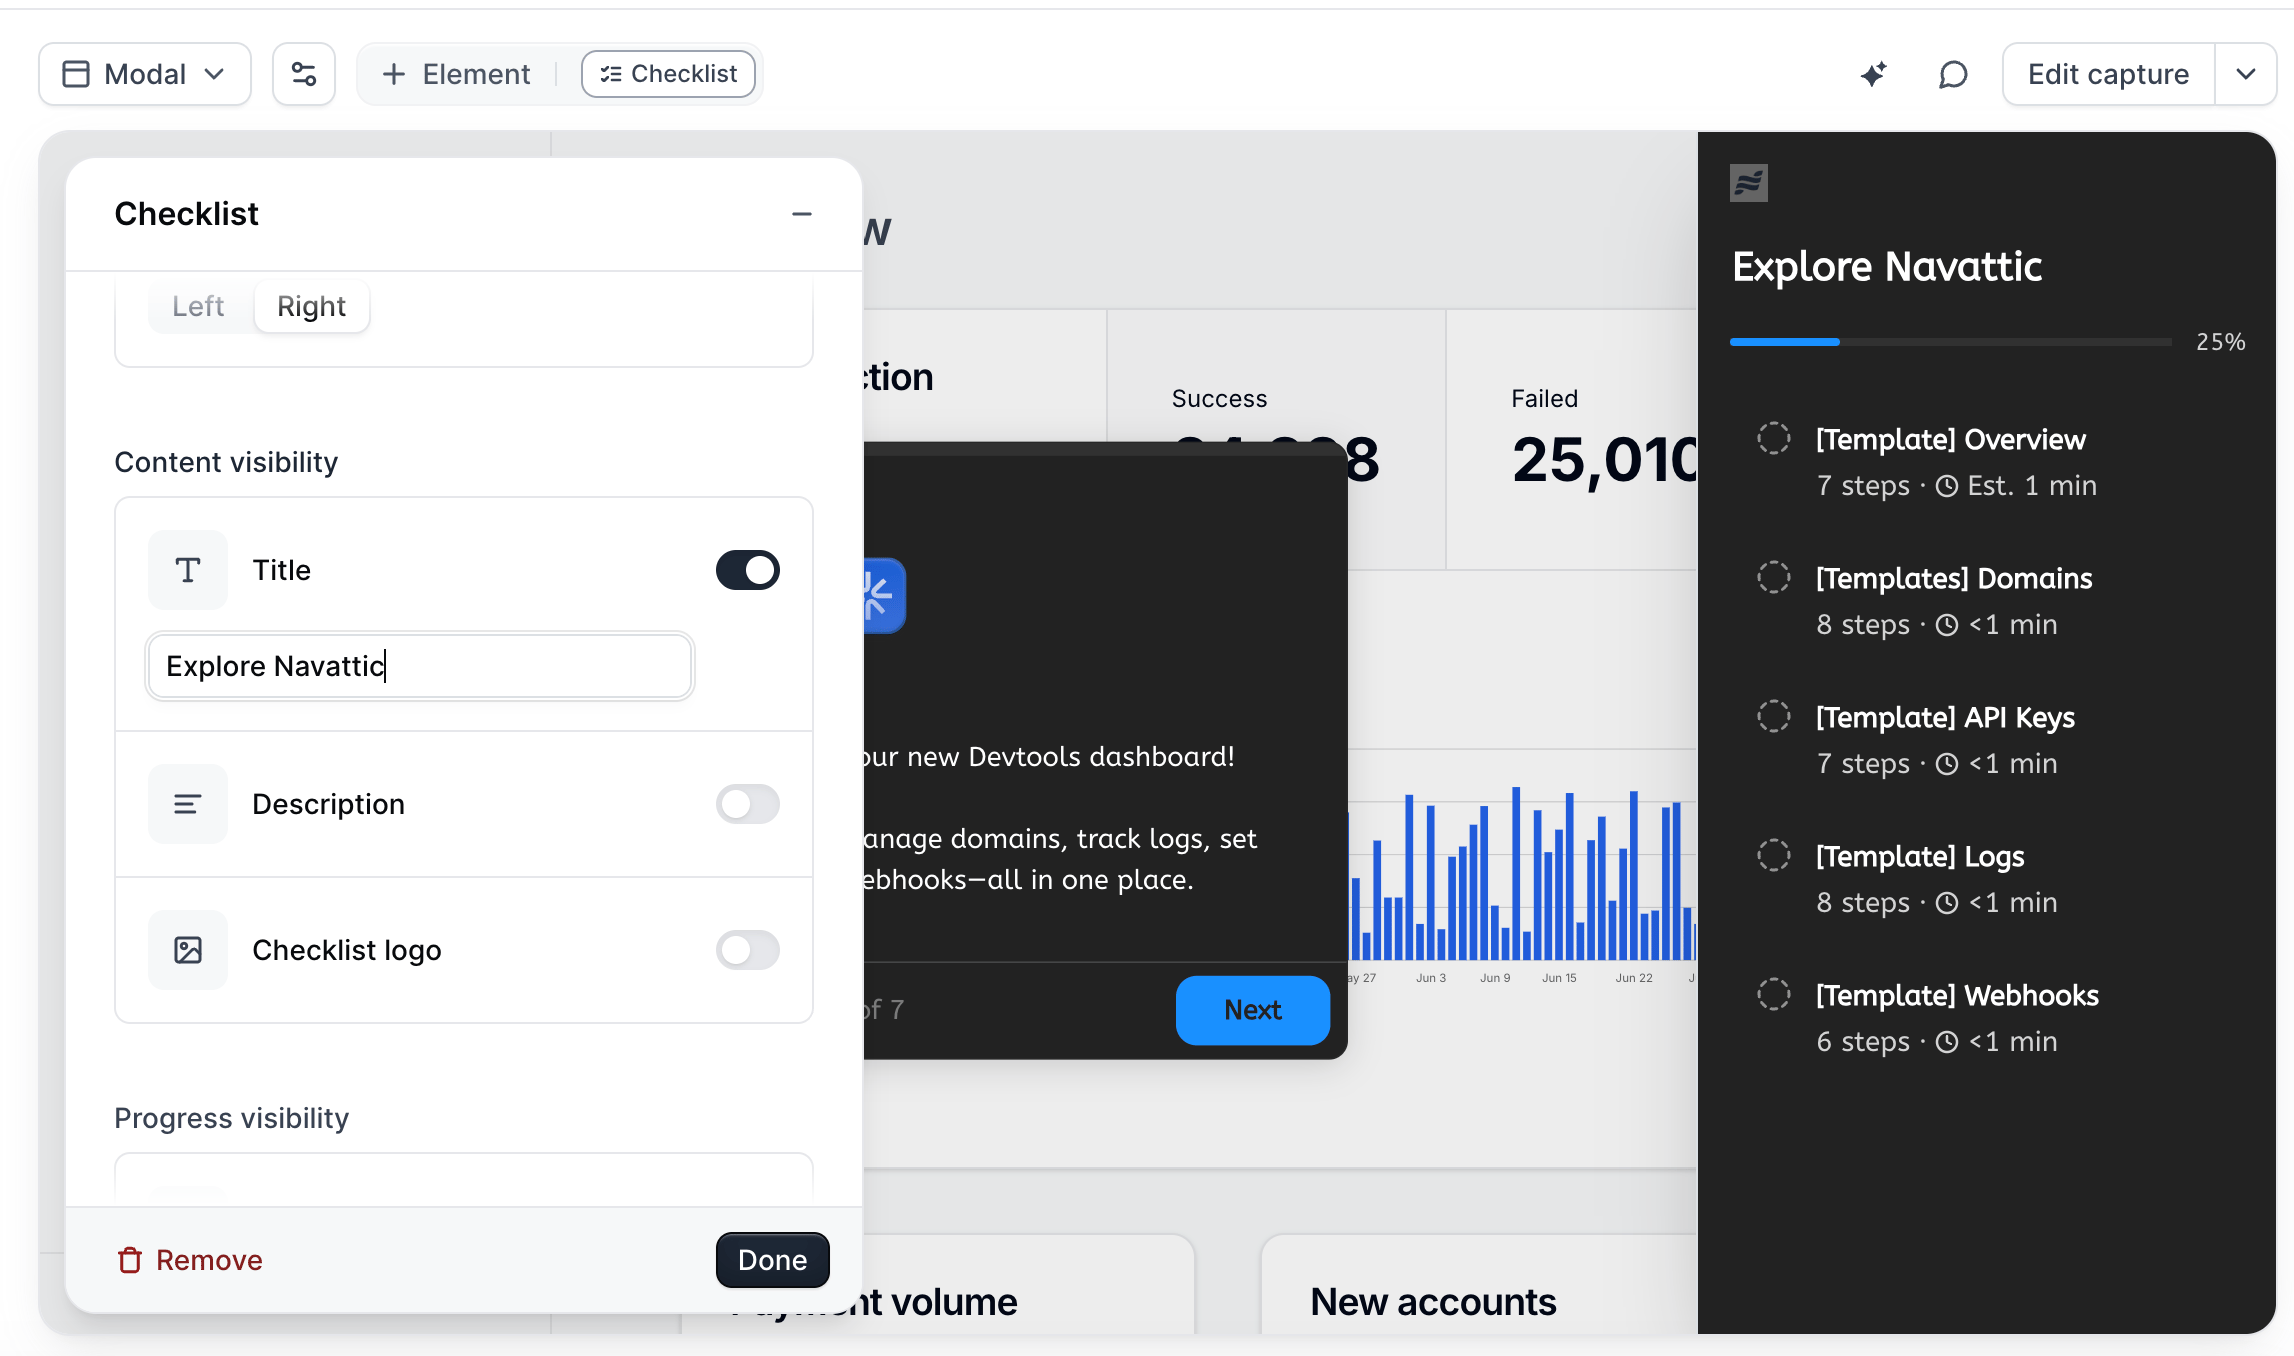
    Open the Checklist settings to add a title, description, and logo. Tasks are added automatically based on your existing Flows. Click on a task in the checklist to edit it – like Buttons in a Flow, Tasks in a Checklist support a variety of Click Actions.

    <img src="https://mintcdn.com/navattic-app/GuOdWqivdactDjf8/images/checklist-title.png?fit=max&auto=format&n=GuOdWqivdactDjf8&q=85&s=b0a05fa3e0b86f106cb6d837ea131fdf" alt="Checklist Title" title="Checklist Title" className="mx-auto" style={{ width:"93%" }} width="2294" height="1356" data-path="images/checklist-title.png" />

    | Click Action | Description |
    | - | - |
    | **Start a Flow** (most common) | Link the task to a Flow in your demo. Select from any Flows within your demo. |
    | **Navigate to URL** | Takes the end user to an external link (e.g., a Knowledge Base or Sign-up page) |
    | **Mark as Converted** | For reporting purposes (i.e., not visible to the end user), this indicates that an end user has clicked a CTA. |
  </Step>

  <Step title="Edit the Launcher (optional for Floating Checklists only)">
    Within the Checklist Settings, you can edit the **Launcher text** to change the text. You can further customize the Launcher in [Themes](/build/themes).
  </Step>

  <Step title="Configure behavior (Optional)">
    Add a Progress bar, estimated completion time, a Checklist logo and/or Remaining count under Advanced in the Checklist builder.
  </Step>

  <Step title="Add CTA button(s) (Optional)">
    Add CTA button(s) to your Checklist by clicking **+ Add CTA button**. Then, enter the URL and optionally edit the text.
  </Step>

  <Step title="Edit settings (optional)">
    From the Checklist editor, click **Settings** to view additional options. Here, you can determine whether you would like the checklist to launch automatically upon Flow start or Flow completion, and select to reset it each time the demo is loaded.
  </Step>

  <Step title="Opening the Checklist from a Flow (optional)">
    Once a checklist has been created and associated with a demo, you can choose how you want a user to engage with it.

    **Launch Checklist After Flow Start**

    If you want a user to see the checklist immediately, you will use the **Launch after flow start** option found in the Checklist Settings.

    **Expand Checklist Action**

    Add **Expand Checklist** to any Beacon, Trigger, or Button in your flow to prompt a Checklist to open at a specific point in your demo, including after the last step. **Expand Checklist** can be paired with any condition, including a [Timer Trigger](/flows#JJQON).

    **Start Hidden Setting & Show Checklist Action**

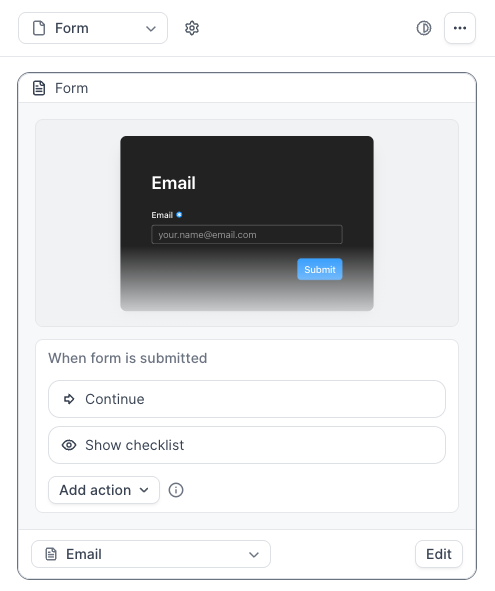
    If you want to hide your Checklist before a user reaches a certain point in the demo, visit your Checklist Settings > Toggle on **Start hidden under Behavior.** Once this is toggled on, visit the Flow with the Form > locate the Form Step > add the **Show checklist** action to "When form is submitted."

    <Info>
      Pair the **Start hidden** Checklist Setting and **Show Checklist** action with your Form step to prevent Visitors from navigating through the Checklist before submitting the Form.
    </Info>
  </Step>
</Steps>

### FAQs

<AccordionGroup>
  <Accordion title="How do I make a Checklist appear for the viewer?">
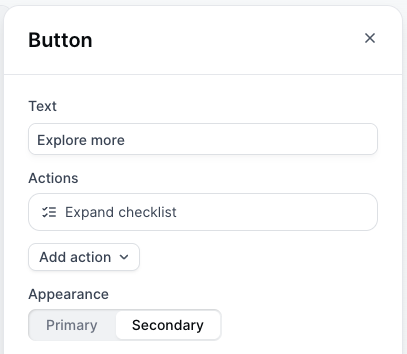
    While viewers can manually expand at any point, you can also add an action to any Beacon, Trigger, or Button in your flow to prompt a Checklist to open automatically at a certain point, including after the last step. **Expand Checklist** can be paired with any condition, including **Timer**.

    <img src="https://mintcdn.com/navattic-app/xA-HBNPicDMUzJjj/images/checklist-demos-8.png?fit=max&auto=format&n=xA-HBNPicDMUzJjj&q=85&s=64b1beea52b6ec309b170c6b0db883a1" size="40" width="412" height="421" position="center" caption="Open checklist action with a Button" alt={true} className="mx-auto" style={{ width:"50%" }} data-path="images/checklist-demos-8.png" />
  </Accordion>

  <Accordion title="How do I adjust the appearance of my Checklist?">
    Visit [Themes](/build/themes) to adjust the appearance of your Checklist. Common adjustments may be:

    * Adjust the shape and size of your Checklist Launcher
    * Change the color of the checkmark
  </Accordion>

  <Accordion title="How do I view the Checklist created?">
    The Checklist will appear in your demo's **Build** tab. You can also preview the checklist when
    previewing the flow.
  </Accordion>

  <Accordion title="How do I move my Checklist to the left or right of the screen?">
    To move the Checklist position, hover over the Checklist in the **Build** tab, click on
    **Reposition**, and drag it to the one side.
  </Accordion>

  <Accordion title="How do I reset my progress in a Checklist?">
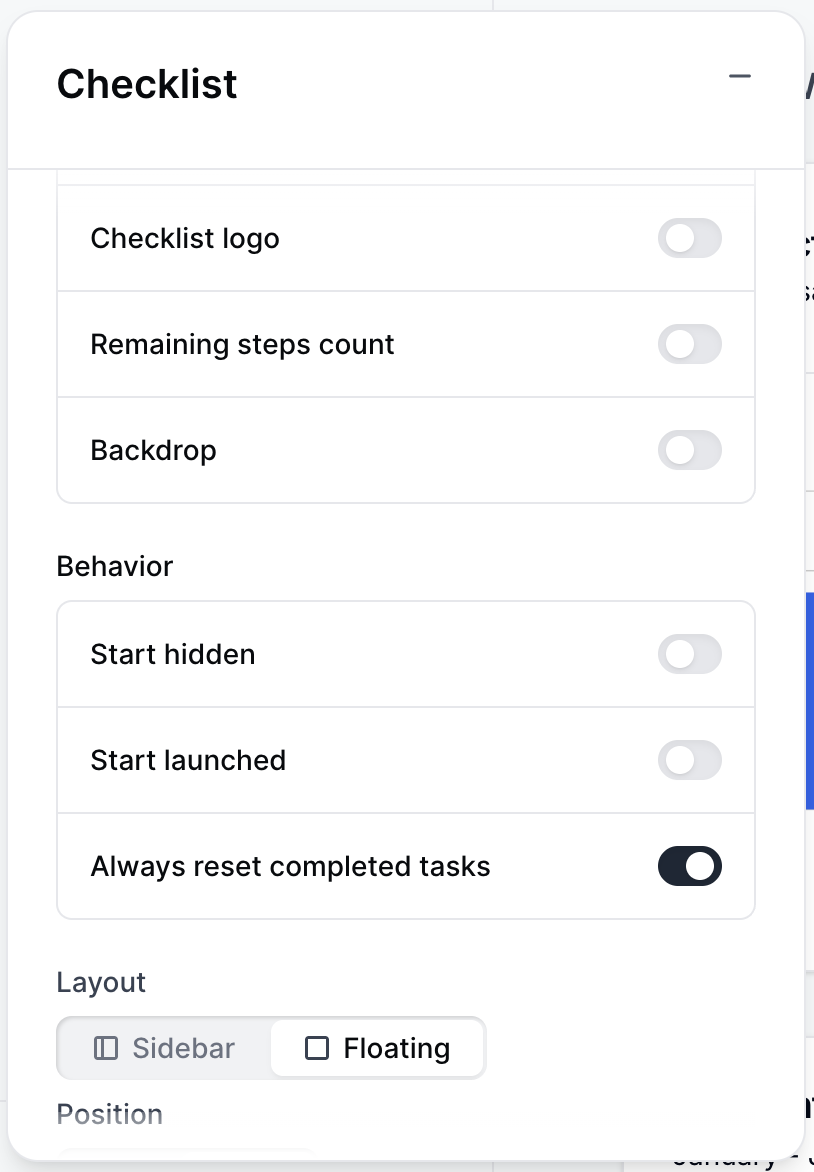
    When testing a Product Demo that contains a Checklist, you may notice that the Checklist tasks are already completed or include a strikethrough. This is due to your browser caching each previously completed step of the demo.

    To restart your Checklist each time, visit your Checklist Settings > **Reset checklist on load**.

    <img src="https://mintcdn.com/navattic-app/iNS2_G9q72-27AQM/images/checklist-reset-tasks.png?fit=max&auto=format&n=iNS2_G9q72-27AQM&q=85&s=f0ab46009dcbb3799cb247f0f02a6230" size="40" width="820" height="1020" position="center" caption="Checklist Settings" className="mx-auto" style={{ width:"72%" }} data-path="images/checklist-reset-tasks.png" />
  </Accordion>

  <Accordion title="How do I hide my Checklist until after a Form is submitted?">
    To prevent Visitors from skipping the Form by using the Checklist, visit your Checklist > Settings > Toggle on **Start hidden**.

    Once this is toggled on, visit the Flow with the Form > locate the Form Step > add the **Show checklist** action to **When form is submitted**.

    <img src="https://mintcdn.com/navattic-app/xA-HBNPicDMUzJjj/images/checklist-demos-10.png?fit=max&auto=format&n=xA-HBNPicDMUzJjj&q=85&s=503c690a66b6badc6a68598ccdfd9c80" alt="Checklist Demos 10 Pn" title="Checklist Demos 10 Pn" className="mx-auto" style={{ width:"59%" }} width="495" height="591" data-path="images/checklist-demos-10.png" />
  </Accordion>
</AccordionGroup>


This documentation is built and hosted on [Mintlify](https://mintlify.com), a developer documentation platform.