> ## Documentation Index
> Fetch the complete documentation index at: https://docs.navattic.com/llms.txt
> Use this file to discover all available pages before exploring further.
# Custom Domains
> Host demos on your own domain such as `demo.acme.com`
export const MediaCard = ({title = '', url, type = 'demo'}) => {
const attributes = type === 'demo' ? {
'data-navattic-open': url,
'data-navattic-title': title
} : {
'data-video': url
};
return
{type === 'video' ? 'Watch video' : 'Try a demo'}
{title}
;
};
Enabled in workspaces on the Growth plan and above.
Setting up a **Custom Domain** will allow your Navattic demos to be served from a domain of your choice, like `demo.acme.com`.
## How to add a Custom Domain
Follow these steps to add a custom domain to your demos:
Go into your account settings page, and click on the Domains tab > + Add Domain > type in your preferred domain. We recommend the format `demo.company.com`.
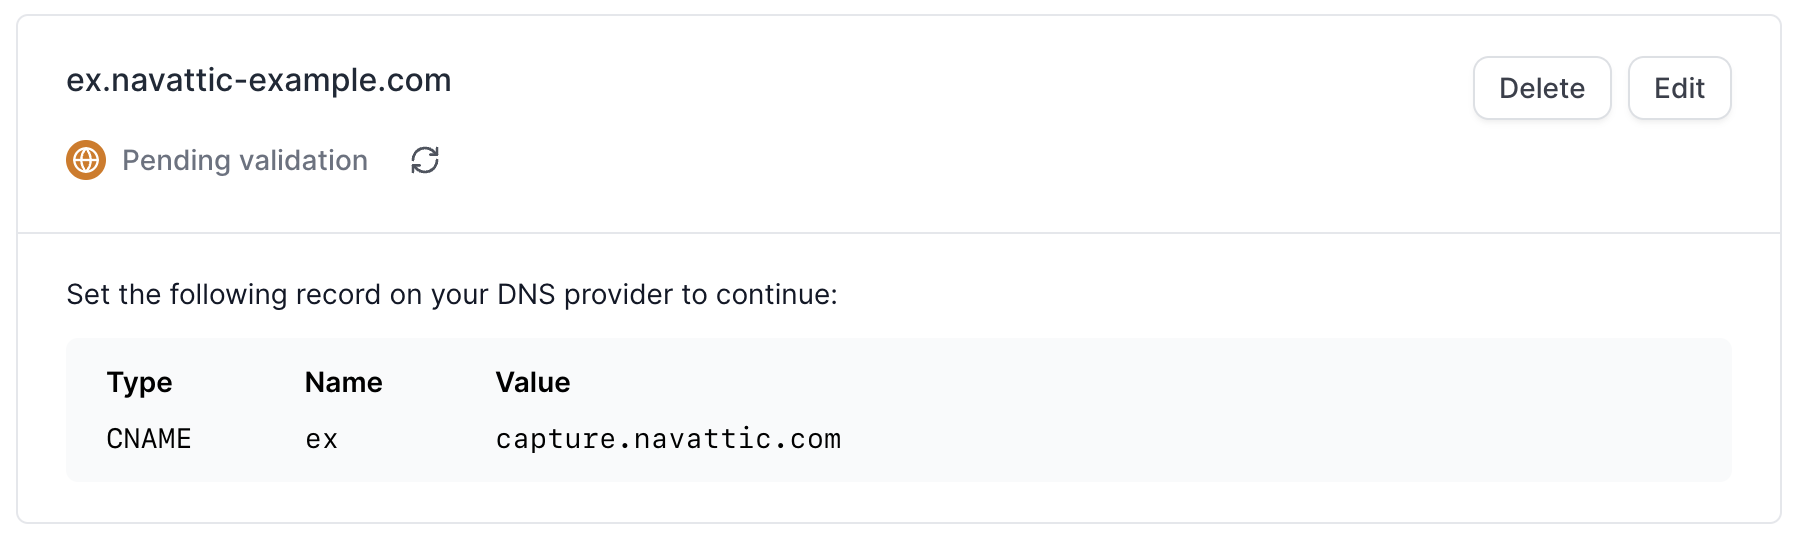
If you have access to your DNS provider (like Domain.com or GoDaddy), add the CNAME record below. If you do not have access, forward this to a member of your engineering team and they can do it for you.
> CNAME demo.acme.com capture.navattic.com
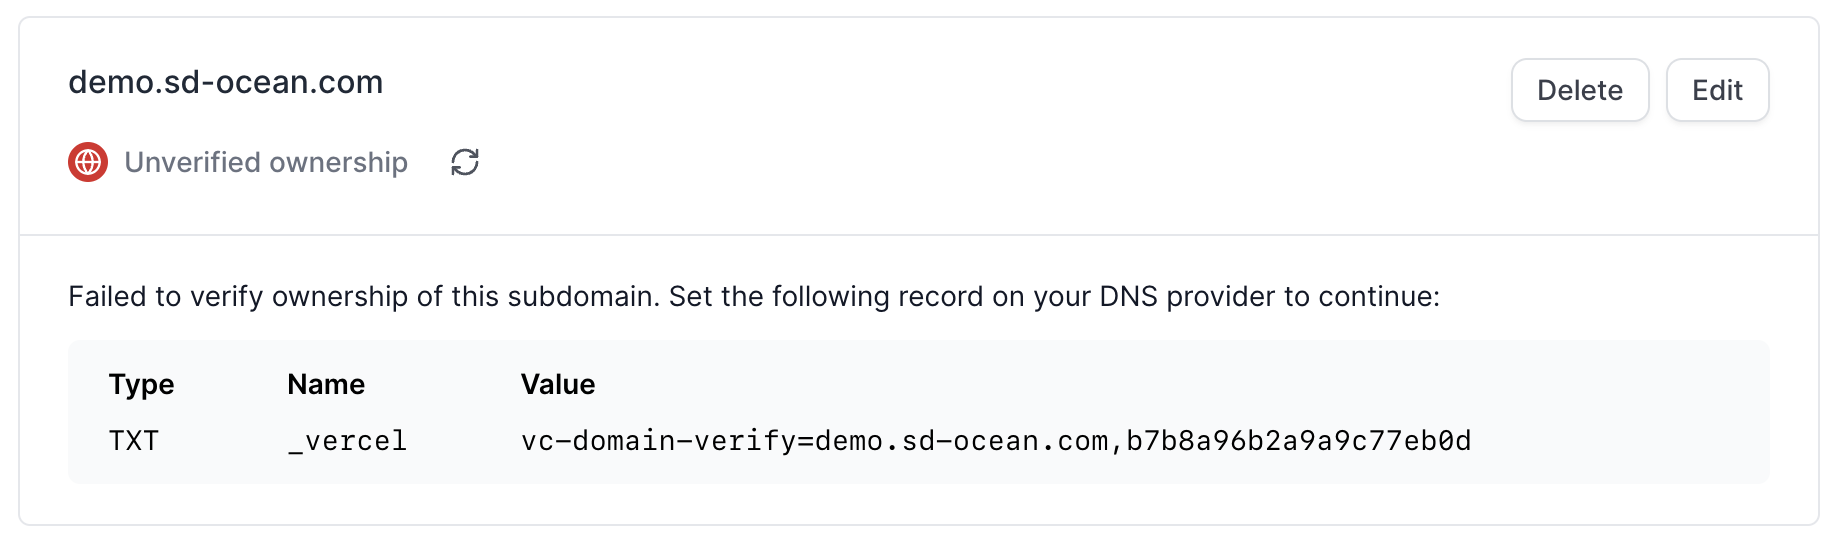
If you use Vercel as your hosting provider, you may see the below message. In order to finish setting up your domain, verify ownership of the subdomain by setting the given record on your DNS provider.
For example, if your Custom Domain is [demo.navattic-example.com](http://demo.navattic-example.com/), complete verification by adding a TXT record for `_vercel.navattic-example.com` where the value is provided in-app.
Once ownership is verified, you will see a similar message to the image below.
Your demos will now be served under `demo.acme.com`! This applies to share links, direct demo links, and iframe embeds.
## Choose which demos a domain serves
Each demo is assigned to the custom domains that are allowed to serve it. A demo only loads on a domain it is assigned to, so a workspace with several domains can keep each brand on its own domain. When a visitor opens a demo on a domain the demo is not assigned to, the demo does not load and the visitor sees a not-found page.
When you add a new custom domain, every demo that already exists in your workspace is assigned to it. Your Navattic workspace subdomain keeps serving every demo in the workspace, whatever the assignments are.
A demo created after you add a custom domain starts with no domain assigned. Assign it before you share it, or its links will use your workspace subdomain.
To change the domains for one demo:
In the demo builder, open the demo menu and select **Project settings**. You can also open a demo's settings from your demos list.
Under **Domains**, turn on the switch next to each domain that should serve the demo. Turn a switch off to stop that domain serving it.
On an assigned domain, open the options menu and select **Set primary**. Only a verified domain can be the primary. Select **Unset primary** to go back to your workspace default domain.
New links for a demo use, in this order:
1. The demo's primary domain, when it is set and verified.
2. Your workspace default domain, when the demo is assigned to that domain and it is verified.
3. Your workspace subdomain, when neither applies.
## FAQs
Adding a custom domain will not impact your existing demo links. Here's how it works:
* **Existing links**: Any demo share links created before adding the custom domain will continue to work exactly as they are. No need to re-share or update them.
* **New links for existing demos**: If you generate new share links for demos that were created before the custom domain was added, those links will now use the custom domain.
* **New demos**: Assign the demo to a custom domain in its settings. Until you do, its new links use your workspace subdomain.
New links for that demo use your workspace subdomain instead, and the demo stops loading on the default domain. Links you shared earlier that point at the default domain stop working, so unassign a domain only when you no longer want it serving that demo.
This documentation is built and hosted on [Mintlify](https://mintlify.com), a developer documentation platform.
 Once ownership is verified, you will see a similar message to the image below.
